
The Tomato Challenge!
We’ve been eating a lot of salads lately. It’s January, and the New Year’s let’s eat healthier this year resolution is still relatively fresh. Plus, my kitchen hydroponic garden is having a bumper crop of lettuce at the moment. So I sent my husband, Larry to the store to buy a couple of tomatoes for a salad. Ever the over achiever, he went to Sam’s club and came home with a box of 10 tomatoes. I don’t know about you, but if I buy 4 tomatoes at the grocery store, I’m lucky if we get through 2 or 3 of them before they go bad. But here I was holding more than twice that many tomatoes. I could probably have used them all up at once in a homemade marinara sauce, but the thought of coming up with enough separate meals to get through all of them before they spoiled seemed like a fun challenge. So, without a real plan in mind I decided to include tomatoes in one meal a day until they were gone, hopefully being eaten, and not thrown into the compost because they overripened waiting to be used.
The result is 5 quick and easy tomato side dishes that you can make at home!
You can see The Tomato Challenge video here on YouTube. Don’t forget to hit the subscribe button to see more of my videos!
Apha-gal syndrome note: Tomatoes are alpha-gal safe, meaning that they don’t have the alpha-gal sugar allergen. BUT, they are a high histamine food. Histamines play a part in the body’s defense against allergens. While I can eat tomatoes just fine without causing a reaction, I avoid them if I am actively reacting to something else. Some people with Alpha-gal syndrome who have coexisting conditions like Mast cell activation syndrome may need to avoid high histamine foods. Every individual reacts differently to different foods. It’s important to learn your own tolerance levels.
Let’s get this Challenge Started!
Day 1
Tomatoes left: 10

Okay this one may seem like I took a gimme, but salad was the main reason for the tomato errand in the first place. So I pressed on with the salad. From my kitchen garden I cut some buttercrunch lettuce, some paris cos lettuce, some beet greens, dandelion greens and microgreens. I tossed them with some red cabbage, red onion, cucumber, dried cherries, some feta cheese, and yes, 2 red tomatoes! A major snow storm was blowing in that day, so I had a pot of homemade chicken noodle soup simmering on the stove all day to go with the salad. Soup & salad and the first day of the challenge was in the books.
Day 2
Tomatoes left: 8
Recipe: Stewed Zucchini, Yellow Squash & Tomatoes
The weather added a twist to my challenge. The snowstorm dumped over a foot of snow and we, along with all of our neighbors, and our little rural town had our work cut out for us to dig out from under it. So, the Tomato Challenge recipes had to use only ingredients that I already had on hand. Lucky for me I had a zucchini, and a couple of yellow squash in my refrigerator. This recipe is a variation on the way my mom always cooked zucchini, which we had in abundance in the summer.
First, I scalded and peeled three tomatoes. Rather than do this, you could also toss all of the veggies in olive oil and char them in a hot oven. The tomatoes would peel just fine and you would be adding another layer of flavor to the dish. If you try that, let me know how you like it!
The vegetables are sauteed along with some onion, garlic, and crushed red pepper. Then they’re stewed in tomato sauce along with some honey and balsamic vinegar until they are tender and the sauce has reduced and thickened. A topping of parmesan and mozzarella cheeses finishes off the dish. I used Violife vegan Mozzarella shreds, but you can use whatever cheeses you prefer.
Larry cooked some chicken on the smoker and I baked some potatoes to go with this hearty side dish.
Day 3
Tomatoes left: 5

On Day three we were able to get out of the house. We had a late lunch in town, so a light meal for dinner seemed appropriate. I sliced 2 tomatoes and some fresh mozzarella cheese. I harvested a couple of basil leaves from my hydroponic garden and sprinkled them over the top along with some salt, pepper, and olive oil. I didn’t have time to make a balsamic reduction to drizzle with the olive oil, but if you do, that’s the way to go! In keeping with our light meal idea, we served this caprese salad with some shrimp cocktail along with some cheese and crackers. Great movie night meal!
Day 4
Tomatoes left: 3
By the evening of day four the remaining three tomatoes were looking pretty ripe, and maybe a little weary of the wait in line to be used. What better way to bring back memories of warmer days, than to have a light and summery BLT for dinner. Well, let’s make that a TBLT. If you can eat pork bacon, there’s nothing better for this sandwich. For me, though, it has to be turkey. I will, however, let you in on the secret to great turkey bacon which I learned from my friends in the Alpha-gal On A Dime Facebook group. Are you ready? It’s duck fat. That’s right, duck fat. If you have it or can get it, a little duck fat in the skillet before you add the turkey bacon is the key to making really good turkey bacon. Did I mention that it’s healthy? No, I did not. Because it isn’t. Who eats bacon for health reasons? Turkey bacon is never going to be as good as real bacon, so don’t bite into it thinking it will. But truly, that little extra that the duck fat gives it makes all the difference. Try it!! If you do try it, let me know in the comments or on my Susan By A Thread Facebook page!
Okay, so that’s the bacon. I grabbed a few leaves of lettuce from the garden and sliced the tomatoes. I had some sourdough bread, so I buttered the bread, brushed my griddle with the remaining duck fat from the bacon pan, and toasted the bread on the grill. Then a quick stacking of ingredients, bread, mayo, lettuce, bacon, tomato, salt & pepper creates a masterpiece of a BLT. Delicious!!
Day 5
Tomatoes left: 1
Recipe: Fresh Pickled Tomato & Cucumber salad
If you haven’t noticed a theme developing of dishes reminiscent of warm summer days, well, you should. It was cold and snowy in Nebraska. We needed some (imaginary) summer. To use up the last tomato I put together a fresh pickled tomato and cucumber salad. It’s so easy and refreshingly good as a side dish to a comfort food meal.
Chop the vegetables into uniform sized pieces and place in a small bowl. Add the onion and dill. Stir in the vinegar and honey, then season with salt and pepper and set it aside to marinate while you prepare the rest of your meal. I had a couple of slices of cooked turkey bacon left over so I crumbled those into the salad as well. I recommend waiting to add the bacon until just before serving so it doesn’t get soggy in the marinade. I served this as a side dish along with homemade macaroni and cheese and turkey smoked sausage.
That wraps up the challenge! You can find all of these recipes on my blog, the link is in the description. Please take a moment to subscribe to my channel! If you try any of these recipes, let me know how it turned out in the comments, or on my Susan By A Thread Facebook page.
Thanks for stopping by my blog! I hope to see you again soon. Until next time, Live, Eat, and Travel Safe!

This is the 5th recipe in the Tomato Challenge. Read the Tomato Challenge Blog Post here.
See the Tomato Challenge video on YouTube.
Ingredients
1 ripe tomato
½ medium cucumber
2 or 3 thin slices of red onion
1 T fresh dill (or ½ t dried dill weed)
2 T white vinegar
1 t. honey
2 slices of cooked turkey bacon
Salt & Pepper
Instructions
Dice the tomato. Gently squeeze out some of the tomato liquid before adding tomatoes to a bowl. Cut the cucumber lengthwise into quarters and then slice into chucks about the same size as your diced tomatoes. Add to the bowl. Cut the red onion slices into thirds to make small strips, and add to the bowl. Chop the dill into fine pieces and add to the mixture in the bowl
Add the vinegar, honey, and salt & pepper to the bowl and mix well. Set aside and allow the vegetables to marinate for 15-30 minutes, stirring occasionally. Before serving, crumble the bacon into the bowl and stir well. Add more salt and pepper if needed.
Makes approximately 4 half cup servings.
This is the 4th recipe in the Tomato Challenge. Read the Tomato Challenge Blog Post.
You can watch the Tomato Challenge video here.
Ingredients
2 ripe tomatoes, sliced
2 large lettuce leaves tear to fit bread
4 slices of Oscar Meyer Turkey bacon
1 T Duck fat, or vegetable oil
2 slices of sourdough bread
1 T Country Crock plant butter
1 T Mayonnaise
Instructions
Prepare vegetables as directed above. Add the duck fat to a large skillet and heat on medium until melted. Add the slices of turkey bacon to the pan and cook on medium heat, turning occasionally until crispy and well browned on both sides. Remove from bacon from pan and place on paper towels to drain off the excess fat. Using a pastry brush, pick up any remaining duck fat from the skillet and brush onto a griddle. Preheat the griddle to toast the bread. Spread the plant butter on one side of each slice of bread and place on the heated griddle. Brown the buttered side as desired. Flip bread and warm the other side for a minute or two.
Assemble the sandwiches. Spread mayonnaise onto the bread, layer on the lettuce, bacon, and tomato. Season the tomato slice with salt and pepper, top with the remaining slice of bread.
Serve with Tomato Cucumber Salad

This is the 3rd recipe in the Tomato Challenge.
Read the Tomato Challenge Blog Post here.
Click here to see the Challenge video
Ingredients
2 ripe tomatoes sliced in ¼ inch slices
1 ball of fresh mozzarella cheese sliced in ¼ inch slices
2-3 large leaves of fresh basil
Extra virgin olive oil
Balsamic vinegar
Instructions
Arrange tomato and cheese slices on a plate or tray, alternating tomatoes and cheese until they are all placed in a line.
Stack the basil leaves and roll them into a “cigar” shape. Slice thinly to make ribbons of basil. Sprinkle basil ribbons over the tomatoes and cheese.
Drizzle with olive oil and balsamic vinegar
Season with salt and pepper
Serve as a light refreshing side dish, or add to a charcouterie board.

The Tomato Challenge Recipe #2
This is the Second recipe in the Tomato Challenge. Read the Tomato Challenge Blog post here. You can see the whole challenge here on YouTube.
This recipe can be easily converted to vegan by using plant based cheeses and substituting the honey with vegan honey or beet sugar.
Stewed Zucchini
Ingredients
4 c water
4 c Ice water
3 small tomatoes
2 small yellow squash
1 medium Zucchini
1 medium onion
3 cloves of garlic (minced)
½ t. crushed red pepper
2 T Extra virgin olive oil
2 T. Fresh Basil, (chopped)
1 T fresh Oregano (chopped)
1 15-ounce can tomato sauce
1 t. Balsamic vinegar
1 t. honey
1 T shredded parmesan cheese
1 cup shredded Mozzarella cheese
Instructions
Bring 4 c. water to a boil in a sauce pan. Fill a bowl with the ice water and set aside. Place the tomatoes in the boiling water and allow to simmer until the skins begin to crack. When skins crack open, remove the tomatoes from the pan with a slotted spoon and place immediately in the ice water bath to stop the cooking process and allow to cool. (You can also roast the tomatoes to loosen the skins or skip this step, and go straight to chopping your tomatoes along with the other veggies if you’re in a hurry, but you will have bits of rolled up tomato skins in your dish.)
Rinse the zucchini and yellow squash. Remove the ends, and chop into 1-inch pieces. Peel the onion, remove the ends, and chop into 1-inch pieces. When the tomatoes are cooled, peel off the loose skins, remove the stem and blossom ends and chop the tomatoes into 1-inch pieces. Set aside.
In a large skillet, heat the extra-virgin olive oil and add the onions. Let the onions cook, stirring occasionally until they become tender and transparent. Stir in the crushed red pepper and the garlic. Sauté for a minute or two until the garlic becomes deliciously fragrant.
Add the zucchini, yellow squash, and tomatoes. Stir to combine. Add the basil and oregano and season with salt and pepper. Pour in the can of tomato sauce and stir. Add the honey and the balsamic vinegar. Stir.
Bring to a boil, reduce heat, and allow the mixture to simmer for 10-15 minutes or until the vegetables are tender and the liquid has reduced and thickened.
Sprinkle the parmesan and mozzarella cheeses on top of the mixture—do not stir it in. Season again with salt and pepper. Turn off the heat and cover the pan to allow the cheese to melt before serving.

This is the 1st recipe of the Tomato Challenge. Read the Tomato Challenge Blog post here. Click here to see the whole challenge on YouTube.
Mixed Greens Garden Salad with Dried Cherries, Feta, and Microgreens
6-8 cups of chopped lettuce greens
4-5 slices red onion. Cut each slice in to 1-inch segments
½ cucumber, thinly sliced
2 or 3 thin slices of red cabbage
2 or 3 small ripe tomatoes, diced
½ c dried cherries or cranberries
½ c crumbled feta cheese
A handful of microgreens
Place Lettuce, onion, cucumber, red cabbage, and tomatoes in a salad bowl. Toss to combine. To the top of the salad add dried cherries, feta cheese and microgreens. Do not stir in. Dress with olive oil and vinegar or your favorite salad dressing.

In the post-covid days of supply issues everywhere you turn, even simple things like turkey breakfast sausage can be hard to find sometimes. Well, if you need a specific kind of sausage, that is. Since I’m allergic to beef, pork, or lamb sausage, I have to find turkey breakfast sausage to have with our eggs and pancakes.
We live in rural Nebraska. Our local small-town market doesn’t carry turkey sausage. A 15-mile drive to the nearest city gives me more grocery options, but I can’t always find bulk turkey breakfast sausage. Walmart usually has it, but on my last shopping trip they did not.
I always feel more comfortable making my own anything simply because I know what’s in it. Recipes and formulations can change, and hidden ingredients can be trouble. Homemade gives me more peace of mind because I have control over the ingredients.
So I started researching breakfast sausage recipes online. Turns out it’s not all that hard. And, I think it’s better than the store-bought sausage!
I don’t have a meat grinder, so I used store bought fresh ground turkey and added spices from my cupboard. Don’t get too caught up with the exact spices. Experiment with what you have on hand before you spend money on specific spices.
You can find a video of this recipe on YouTube.
Here’s how to make it:
Ingredients:
1 pound ground turkey
1 t. ground fennel seed
1 t. dried thyme
½ t. red pepper flakes
1 t. dried sage or 1 T chopped fresh sage
½ t ground savory
1 T duck fat
½ t. kosher salt
½ black pepper
Instructions:
Add all ingredients to a large bowl. Mix well with your hands until well combined.
Lay a sheet of wax paper near the bowl. Form the turkey breakfast sausage mixture in to small patties. Place the patties in a skillet preheated on medium heat. Allow the patties to cook for 10-15 minutes, turning occasionally. Take your time, you don’t want them to burn on the outside before they are cooked inside. Lower your heat and cover the pan of they are browning too fast. Use a meat thermometer to check the temperature. 170◦ Fahrenheit is the safe temp for poultry. Remove from the pan and place on a paper towel. Enjoy!
It’s a cold wintry day, and getting colder. Winter Storm Elliot is forecasted to bring minus 50-degree wind chills to Nebraska overnight. The furnace is churning away, and with the help of a warm sweatshirt and cozy socks, it’s keeping the cold at bay for the most part. Still, what better way to take the edge off the chill, than to brew up a hot, fragrant, cup of lemony, gingery gunpowder green tea, and curl up with a good book for the afternoon?
Choosing tea ingredients
My tea blend of choice is very much dependent on my mood. I will throw in ingredients one at a time based on what seems good that day. Choosing the ingredients thoughtfully is part of the experience of tea for me. So is choosing the brewing method, and even the mug for the tea. Today I’m using a mug and tea infuser set that my son gave me for Christmas a couple of years ago. Using the mug always makes me think of him and the thoughtful way he approaches gift giving.
Whenever possible, I prefer to grow and dry my own herbs. Today’s blend of gunpowder green tea with lemon, ginger, and sage is no exception.
The actual tea leaves I buy in bulk from organic sources online. Tea is grown, harvested, and processed using specific methods, that I can’t do from home. Gunpowder green tea gets its name from the small round pellet shape that is the result of rolling the tea leaves. As the tea steeps, the little “pellets” unroll into pretty green leaves.

The lemons I purchased and dehydrated at home. The same is true for the ginger.
The sage I grew in my kitchen hydroponic garden and dehydrated the leaves for both cooking and making teas. Adding savory herbs to teas has been a game changer for me. You might not think of sage as a tea flavor, but once you try it you’ll love the depth of flavor it adds without overpowering the blend. I have also used oregano, parsley, and celery in the same way with great results. Keep an eye on this blog for those recipes!
Recipe: Gunpowder Green Tea with Lemon, Ginger, and Sage
Ingredients:
I used about a tablespoon each of:
- gunpowder green tea
- dried lemon slices (you could also use dried or fresh lemon peel if you don’t have dried slices)
- dried ginger
- dried sage
Instructions:
Add the ingredients to the infuser one at a time, taking a moment to crush the sage leaves to release the fragrance and flavors of the sage.
For green tea, you want the water temperature to be around 175 to 180 degrees Fahrenheit. I don’t obsess over the temperature much, just bring the water to a full boil, and then let it settle for a minute or two before pouring it over the blend of tea and herbs.
I like my tea on the strong side, so I let it steep up to 10 minutes, but you don’t have to go that long. Anywhere from 5-10 minutes will get you a flavorful tea to enjoy.
When you’re ready, lift the infuser and let it drain out into the mug.
I found that this tea was perfect as is and did not need to be sweetened, but you can add some honey or sugar. If you like your tea sweet, Belgian Rock Sugar is a great vegan (no animal ingredients or processes) option.
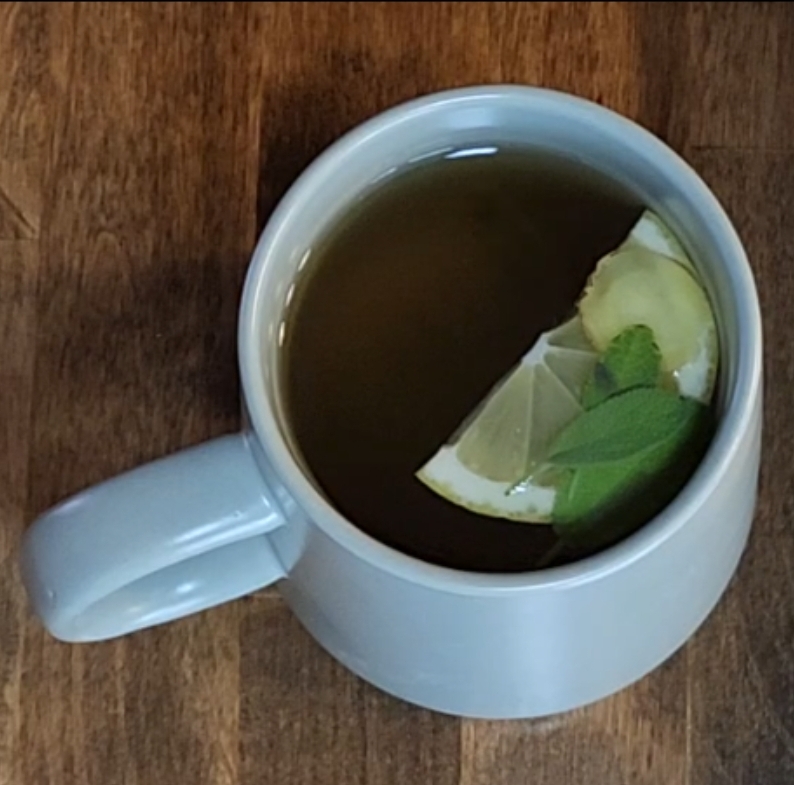
I garnished my tea with a fresh lemon slice, fresh ginger slice, and a couple of fresh sage leaves. This added a pretty touch and a fresh aromatic boost to this already fragrant tea!
A link to my video of the Gunpowder Green Tea with Lemon, Ginger, and Sage is below. Be sure to like and subscribe to my YouTube channel. If you try this tea, please leave a comment below with your thoughts!
Enjoy and stay warm!
I focus on living my best life with Alpha-gal Syndrome using a strategy based on advice I received many years ago.
A Piece of Advice
The best advice ever given to me was from a doctor at the University of Michigan Medical Center in the late 1990’s. After years of seeing one doctor after another and an array of potential diagnoses, this guy figured it out in a 30-minute office visit. It was fibromyalgia, a condition characterized by chronic, widespread musculoskeletal pain. He was very kind, and offered me this advice: He said, “There are two kinds of people with fibromyalgia. Those who do well, and those who don’t. Those who do well stay active, social, and maintain a positive outlook on life. Those who don’t do well, isolate, dwell on their pain, become sedentary, and allow it to consume them to the point that it becomes their identity.”
He was absolutely correct!
Those Who Don’t Do Well
I sought out a fibromyalgia support group and met the exact range of people he was talking about. The group discussion usually centered around participant’s discomforts, disability, and feelings of discouragement. Of course, supportive encouragement and helpful information was offered, but the focus was far from, “Let’s conquer this and get on with living our best lives.”
Those who do well
About that same time I learned that a nurse friend whom I knew also had fibromyalgia. She had no interest in the support group. She just didn’t have the time. Besides nursing, she had a family and was an avid outdoor enthusiast. I was intrigued by the disparity between the people who viewed their fibromyalgia as a disability, and this nurse who lived, played and worked hard in spite of it. Did she have rough days? Sure. But her focus was not on her illness. Her focus was on living her life.
Focus on Living Life
It took some time for me to get the hang of living with the condition. I learned that staying active, managing stress, and eating a healthy diet was more effective than any pill. Today, while I do have painful days, over all I manage very well. Pain is not my focus, nor is it my identity. Very few of my friends even know that I have fibromyalgia. I have places to go, things to do, and better things to talk about! I’ve gone ziplining in Costa Rica, climbed a waterfall in Jamaica, rappelled down a waterfall in Mexico, walked the streets of Aruba and Bali, fished for walleye in Canada, cooked meals on campfires, and much, much more, all since that doctor appointment back in 1998.

Alpha-gal Syndrome Is Not Who I Am Either
Today I am working every day to apply this principal to Alpha-gal syndrome. If you’re not familiar with it, Alpha-gal syndrome is a tick-bite induced allergy to non-primate mammals. With Alpha-gal, I do have to accept some limitations in regards to foods that I eat and products that I come in contact with. And, while I find it extremely uncomfortable, everyone around me has to know about it. Whether it’s relatives at a family meal, or strangers waiting tables in a restaurant, a conversation has to be had to assess and minimize exposure risks. In spite of those things, I still travel, I still go to friends and family meals, restaurants, and sporting events. I choose not to allow Alpha-gal Syndrome to become who I am. I choose not to allow it to stop me from living my life.
Let’s Conquer This and Get On With Living Our Best Lives!
Everyone has challenges in life. And some days it seems like the hits just keep on coming. But pain, adversity, problems, are not who you are. They are just challenges that you face. There is so much more that makes you a unique and beautiful human.
If you sit down and decide that an obstacle is just your life now, then it will be.
But if you stand up and stubbornly refuse to allow a circumstance, a diagnosis, or a limitation to determine the course of your life, you will be free.
Stand up!
Once upon a time I was a happy carnivore. I regularly cooked and ate steaks, brisket, ribs, sausage and burgers from cows, pigs, even deer and elk. I like my steaks rare—just knock the horns off! Today I neither cook, nor eat, nor order in restaurants, any of those delicious, carnivorous treats. The reason why? Well, let’s flash back to the beginning….
The Beginning
In the spring of 2022, my husband Larry and I bought a small camper and hit the state parks!
Our camper’s maiden voyage was in May. We camped at Windmill State Recreation Area in Gibbon, Nebraska. On the second day, we walked the trail that circled the park. Partway along the trail, after a stretch of walking through some tall grass, we noticed ticks on our jeans. Gross! We brushed them off and kept going.
Back at the camper, we did a quick tick check and went on with our day. Later in the afternoon it got warmer out and it was time for shorts. When I changed, I found a tick attached to the back of my right knee. Larry removed the tick and we pretty much forgot about it.
Bug Bites?
During the month of June, I had a lot of what I thought were bug bites. We were camping every weekend, so I assumed that it was just part of spending so much time outdoors. I didn’t think much of the itchy welts, even though they were not typically on exposed parts of my body. They were mainly on my stomach, arm pits, and groin area.
We took a break from camping in the beginning of July, but the “bug bites” continued. Then, on July 12th, after eating an elk steak at home, I broke out in welts all over. Obviously, these were not bug bites. I googled causes for hives. One of the search results rang a bell. Hives can be caused by a tick bite induced meat allergy called Alpha-gal Syndrome! Remember that tick bite back in May?
In retrospect, what I did next was risky, and let’s be clear that I am not recommending it in any way. Alpha-gal reactions can be dangerous and life-threatening, and I seriously underestimated the risk out of sheer ignorance of the condition. So, disclaimer: Kids, do NOT try this at home. Really, don’t. Anaphylaxis is bad.
A Dangerous Experiment
I decided to stop all mammal meat and dairy for one week. After that week I would try eating a steak and see if the reaction occurred again. During that week, the hives subsided. At the end of the week, we went to Texas Roadhouse. I ordered the prime rib, with a buttery sweet potato and those bacony green beans along with a Texas pour glass of pinot noir and those warm cinnamon butter rolls. It was delicious! Thinking back, if I had known that I was eating my last slice of prime rib, maybe I would have savored it more. Alas.
The thing about Alpha-gal reactions is that they are not immediate. The Alpha gal sugar that causes the reaction passes through part of the digestive process before your body reacts to it. So I didn’t start scratching at my armpits in Texas Roadhouse. Later that night, I did. Hives continued to develop and become widespread throughout the next morning.
Thankfully, that reaction was limited to hives and itching, and I didn’t end up in the emergency room. But Alpha gal syndrome can be unpredictable, so please don’t take that chance.
Now What?
Now I felt like I knew what the problem was. But what now? An allergist confirmed my self-diagnosis and showed me how to use an epi-pen. But other than that, she didn’t offer anything useful about how to proceed. I learned more from others with Alpha-gal syndrome in Facebook groups than the doctor offered.
I learned that animal derived products are everywhere. They are hidden in ingredient lists as natural flavorings, and hidden behind big words like magnesium stearate, and mono & diglycerides–or not listed at all because they are used as part of purification processes. Cane sugar, and beverages like Dasani water and some beer and wines are filtered through animal bone char. Turkey or chicken sausage sounds safe, but if the small print on the label says “pork casings” or “beef collagen casing” they are not safe. Your Chapstick probably contains lanolin—which comes from sheep. It’s basically an ingredients label minefield that takes real detective work to sort out. Animal products are used in cosmetics, and medications as well. Those pain reliever gel caps–gelatin is derived from beef.
Navigating Alpha-Gal Syndrome

Alpha-gal syndrome presents differently for everyone. Obviously, I can’t eat any meat from mammals (birds and fish are okay). With the exception of butter, I can tolerate occasional dairy without a reaction. Some can eat dairy freely, some not at all. I can’t cook meat. Like me, some people with AGS have “Fume reactions” to aerosolized alpha gal sugar particles resulting from cooking meat or being around strongly concentrated animal waste—a feedlot for example. Even wearing leather will cause a rash for me, but not everyone with AGS has trouble with leather. Thankfully I have never had trouble breathing with a reaction, but some do, and it means a trip straight to the ER. Do not pass go, do not collect $200. Finding your individual sensitivity levels takes time and can cause a lot of anxiety about food.
Navigating Alpha-gal Syndrome can be scary, but it is doable. I promise! So, take a deep breath and gather your courage. You’re not alone. We are on this journey together.
If you’re reading this because you or someone you love has been diagnosed with Alpha-gal syndrome, I hope you will follow my blog for information, encouragement, support, alpha-gal safe recipes and meal ideas. You can also find me on Facebook and YouTube by searching for Susan by a Thread where I will be adding content regularly as we learn together.
For general information about Alpha-gal syndrome, use this link as a starting point to find some basic information.